Monday, January 30, 2012

Did it!

Took me a few days to get in the right frame of mind... but today I cut my large triangles for the background for the Made In Cherry quilt.  Whew!  The 20 1/2" squares were easy, but even the template for the enormous flying geese pieces took 12 sheets of A4 paper, and quite a bit of sticking.  However, I got it done.  Kids away today on a tiki tour with their dad, so in the peace and quiet, with just the washing machine and dishwasher humming in the background... I commence to cut.  I pinned my triangles onto my folded fabric, so I could cut two at the same time, then once they were rotary cut around (after moving the cutting mat about five times), I actually folded my template in half, and placed the fold on the remaining folded section of fabric, and cut another triangle, flipped it and repeated for the other side.  Sounds confusing...??  Anyway, it's done.  It fits!  All is glorious with the world.


OK, so I've sewn on two sets of flying geese triangles, and attached them with the corner square to the central square.  Long seams... bit tiring... might finish this one off tomorrow.

Friday, January 27, 2012

Background Fabric...

Check!  When I started cutting the squares for the Made in Cherry quiltalong... I wasn't sure what direction the background was going to take.  After a very successful trip to The Country Yard - I came home with the perfect solution (thank you Kerryn and the team of lovely ladies).

French General Petite Ecole - little red/burgundy dots on I suppose what you'd call a mushroom or mink background.  Priceless!


As far as progress goes... I have finished piecing all my points, and have two more seams to complete to get my central square finished.  Whew!  I think I was most worried about gusts of wind (named Nadia and Dylan) whooshing my little squares away from their carefully randomised placements.  Next problem will be actually cutting out the required humungous triangles from the background fabric... instructions say to cut a 43" square and cut on both diagonals... sounds scary.  I have drafted the pattern roughly into EQ6 and printed off the template for the triangle which I will use to cut around.  Much safer I hope.  The beauty of EQ6 templates is that they cut the bunny ears off, and allow perfect matching - music to my ears.

I've chosen my next grouping of fabrics for Swoon block number two.  This time the large floral (which was the star in the last block) will feature in the little accent triangles, the solid will be the largest bit, and the grey print will be the central star.


 All ready for next month. 

I've also finished blanket stitching the last few flowers and leaves on My Tweets central panel.  It sure has been a busy few weeks.

Monday, January 23, 2012

Let the madness commence

Had to quickly remove the circle quilt from the design wall to display all the 200+ 4 1/2" squares I cut for the Made in Cherry quilt.  Ohhh, ahhh... I hear from the cheap seats.  Looks like this one is going to be here to stay for at least a little while until it gets pieced into some bigger sections.  I keep thinking about all the great variations/possibilities of this design... I spy... batiks... totally scrappy... brights... will I be mental enough to make another one?  We shall wait to see how this one goes together first.

Well, starts with 100 squares

Then you start to add the pointy bits

But wait there's more

And the finishing triangle bits make the points truely pointy
I'm waiting until the sections are pieced before making any decisions on background fabrics - will keep you posted.  The background is cut into humungous triangles that are attached to the pieced triangles flying geese style, then along with smaller squares for the corners, sewn onto the central square.  I was a bit worried that there would be inset seams (I promise to wash my mouth out) - so was really pleased to read the instructions and realise how easy it is should be.

I have also been merrily blanket stitching around my My Tweets centre block.  Over half way now... I will estimate approximately three quarters (and counting) completed.

I've also had a bit of a blat with the clothes sewing thing... and made my pull on pants (also known as elastic waisted slacks) and at the last minute changed my plans for the top material I had bought and made a rather shapeless, unflattering top that I am a bit cross about. 
Thank you to the 6 years old who took my photo

I sort of saved it by putting elastic through the bottom hem, so at least it does pull in somewhere - looked just a little too maternity (like 9months with twins) - which I figured I just didn't need.  I would like to buy just a bit more of this fabric and make an infinity scarf - because it will go with so many of my other outfits.  I bought the pants material to go with the top material... but am not liking the outfit together - it's a bit nana-ish.  While I realise I am approaching a certain birthday this year, I don't need to look like I'm that old (or older) do I?  I do like the pants with a simple black tunic, and the top is not so bad with jeans.  That just leaves one more piece of fabric which I intend to make the top on the cover of this book with. 

Both the other patterns were from this book too.  You need to trace off the patterns from the pattern sheet then add the necessary seam and hem allowances - which is a bit of a pain and I used the eye ball method which probably shouldn't be recommended.

I was going to use the other fabric for this top too, but worried that it was a bit too floaty and could be difficult to cut and sew with so many bits.  I wonder if I should have risked it - but too late now.

I've also finished my first and last... no just kidding, first Swoon Block. 

24 inches of Swoon loveliness

These were the good seams - I have developed quite a broad concept of good,

and the not so good seams - ended up feeling I was just glad to get the block finished, will hope for better next time... and eternally grateful that I decided to only attempt one block per month. 

What a ripper - literally.  Every seam needed to be adjusted with my trusty little quick unpick.  Partly because I changed construction methods and started pressing the seams open.  Not my favourite way to make things match up - but I was struggling to get my sewing machine to sew accurately through the seam intersections.  How do people who do open seams get them to stay lined up?  At least opposing seams cause the butting together syndrome... I struggled to even get the opens seams pinned together accurately, let alone sewn.

Monday, January 16, 2012

What's on the go?

Well, I think I've been pretty busy.

First off, Block Three, Gail Pan BOM finished:

Blocks One, Two and Three

Second, centre block of My Tweets - fused, awaiting blanket stitch.  This is 34" square so a sizeable block.  I had intended to complete the My Tweets BOM using misty fuse as the fusible web, to give the multiple layers a lovely soft feel - but hell, Misty fuse is like dealing with the devil.  After last month and using baking paper to trace the pattern with mixed results, I purchased an applique mat, and succeeded in getting a whole sheet of misty fuse attached to it... which then stubbornly refused to be adherred to anything else... grrrr.  So I had to scratch it off into a sticky wee ball of sticky stuff - and throw it in the bin.  Well, lets just say I've found just normal, boring old fusible which will add a bit of stiffness, is going to be just fine.  And I still have some hair left.


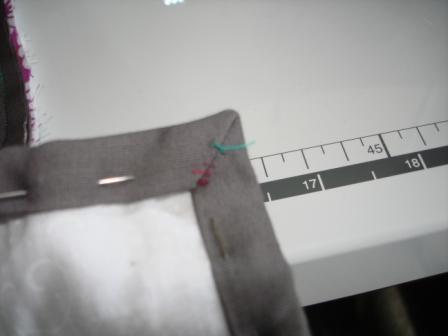
A little closer up detail

Most of Block One

I decided to play along with the Swoonalong happening over at im a ginger monkey, with the intention of completing a block each month.  I've spent the last few days looking at my fabric selections, wondering how to mix and match - and after much pondering, decided to do a three fabric + background block, which will let me highlight some of the fabrics on more than one block, and work them in with different fabrics.  Probably would have been heaps easier to just do a two colour block like the instructions said... but who said it had to be easy?  Yesterday I cut the first block coloured fabrics... and today cut out the requirements for the background fabric.  My tips for getting this finished: Concentrate on one block at a time... and only cut what you need for each block from the background fabric - there is a lot of cutting involved and very easy to make silly mistakes.  I'm going to use several different white on whites... of which I have 1 yard each.

I've started piecing the upper left corner... a lot of thinking going into seam direction... and not sure whether to press seams open instead, in the hope that they aren't so bulky.  What's your opinion?
Other plans include to follow along with sewhappygeek.co.uk who is hosting a weekly sampler quilt along.  Week one has now been completed... well see how Week Two goes... I'm using leftover bits and pieces from my Buggy Barn Courthouse Stars quilt, plus all sorts from the other two BOM's with the intention of perhaps using the finished sampler, or some sort of combination of blocks on the back of the Gail Pan BOM.  So we will see how that goes.
Week One - Woven Block

Week One - Snowball Block
And just to be totally insane, I'm seriously considering jumping on the Made in Cherry quiltalong bandwagon (which is being hosted by pins and bobbins.blogspot.com)... just trying to work out whether I've got enough fabric.  Which I'm pretty sure I have... like who hasn't got heaps of fabric?

As it's Monday, I'll link up with BOM's Away and also Lee at Freshly Pieced on Wednesday (if I remember).

Wednesday, January 11, 2012

I've been a bit distracted...

...as we have had Nana come to visit last week, so although the BIG ONE got finished after she left, not a lot of other stuff got done. 

This was all I could fit in the camera screen... need to do a good outdoor shoot but also need it to stop raining!


Closeup of a less than perfect feather...


The last couple of days have been spent sewing and finishing a little dress for my midget.
One happy chappie
Oh to be 6 and get away with these sort of combinations.
She is very happy, and it is actually a pattern I would sew again!  Wow, how often do you say that??  In fact, who remembers me swearing off any form of sewing that wasn't quilt making??  Should I confess that I have fabric for a pair of pull on pants (what a weird explanation - don't you pull on all pants?) and two tops...?  The fabrics are to die for, so I just have to make them - hopefully before summer finishes.  So a few details, I purchased and downloaded the pattern from Printsew.com - not without it's hitches but all worked out in the end, Simplicity 2377 View C.

After a circle-less week, I have been playing with these babies again... OK, so I need to do more... yes, I have some awaiting the glue stage... they will get added as time goes on - but COOL aye?


I also have pulled out the instructions for Block Three of Gail Pan's Bluebirds and Berries BOM.  Making progress!
A little crooked, still heaps more to do... and I notice I've chopped the last bit off the bottom which is a vine block - although it is just an empty background rectangle at the moment, which probably explains why it got chopped off in the first place.
I've also been keeping an eye on numerous quilt alongs... oh, so tempting... and I've even bought a pattern for one... dang it... and downloaded instructions (although as Nadia would say "constructions" as in "Mummy, do you have the constructions for that?") for another... how on earth did that happen??  How many more weeks of school holidays are there - am I losing my mind??

But sometimes I just have to admit to karma (or whatever it is) - when something happens, and you go, I have fabric that would look great in this... and it's a pattern I really like... and... and... and so I think I'm going to join the "I'm a ginger monkey" Swoon quiltalong (would that be a Swoonalong??) - using these FabricWorm fabrics I got last year.

Do you like them all lined up?
Or a bit more random?  This was two fat quarter bundles that caught my fancy and I thought might work together in some way - or is that swoonway??.
Must be the day of double questionmarks!!  Edited to add I'm linking up with Lee at Freshly Pieced... check out what everyone else has been up to.

Sunday, January 8, 2012

I've knocked the bastard off...

Thanks for the quote Sir Edmund Hilary - which he made upon conquering Mount Everest.  No mountain climbing for me, but I have finished... I repeat FINISHED quilting... and binding my huge 105x90" Log Cabin Stars Quilt. 

Just to jog your memories...
This was actually a pre-finished photo - quilt is currently in the washing machine.
So many firsts with this one:
 * first time using feathers on an actual quilt... and jumbo size ones at that
 * first quilt so BIG... while many of my quilts are on the large side, this is certainly the biggest so far (note to self - remember to make them smaller in future!)
 * first time successfully doing machine applied binding!  Woot!!

I didn't do the machine applied binding quite the way Ms Lottie had taught us... as I'm not a good student and didn't want to pin right the way around the quilt - I'm not greatn at pinning accurately, plus I'm not the greatest at ironing evenly, let alone stitching accurately.

My solution:
Firstly, I cut my binding 2 1/2" just like normal, folded in half, and applied to the back of the quilt and followed the usual instructions, doing the little fold one way, then fold the other way at the corners to make the mitred bit.  I also used a 1/4" seam using my normal 1/4" foot (which is how I do my binding anyway - never had any trouble).

Sorry this photo is a bit dark and blurry - but then I turned the binding to the front aligning it slightly over the stitching line, and pinned just two pins in each corner, before playing around with the actual corner mitre until I was happy with it, then used a needle and thread to put about four stitches through the corner to hold in place.  Did this for all four corners and is something I would recommend for anyone doing any kind of method of machine binding.
 
Starting on a long straight edge, I wrapped the binding towards the front - again using the stitching line as the guide so that the edge of the binding just covered it, then using my normal old 1/4" foot, lined up the left hand side of my foot (which has a 1/8th inch width from the edge to the needle) with the original fold in the binding (the left hand side of the binding in the picture).  Keep going to the corner mitre, needle down in the corner and pivot.  Keep on going!  Make sure that binding is pulled out to the right firmly before you fold it over.  If I was doing something smaller, I probably would iron first from the wrong side of the quilt pressing the binding out, to give the back a neater seam line.

Gives a top stitched effect on the front...
 
Corners on front are pretty good... although not perfect


Corner on back OK, and a topstitch finish on this side also.

Nothing beats a hand finished quilt... but I do agree that there is a time and place for machine applied binding - now that I've found a method that suits me, I will definately be doing it again.


I've also been playing with names for this quilt... and am thinking
"What the F.... feathers"
might just be the winner.

Sunday, January 1, 2012

Happy New Year!

And it is still raining... arghh!

Still, good weather for doing things in one's sewing room.

I have just one more seam to sew on my Courthouse Stars quilt top.  Which I am going to do tomorrow.
Best thing is that I will add some lovely scraps to my pile of scraps for both
the My Tweets and Bluebird & Berry BOM's :-)
Which is just as well, because I will need the design wall free to be able to have a play with these things.

You know, this carpet is excellent for hiding vomit stains... you don't want to know!

This is the beginnings of a quilt from the book "Modern Mix" by Jessica Levitt which when I saw it, though "yes, I have fabrics I want to do this with". 

These are the grouping that I've been rabbiting on about.

This is a range called "fleur nouveau" from Clothworks.

Templates all ready to go... I'm going to do invisible machine applique using
freezerpaper templates and a gluestick... works well.
I've just got a few more of the colours to do the first lot of circles for, and then I'll be plotting away how they fit on the strip... and probably will need to do a whole lot more circles.  But it's not so bad doing a little bit at a time (I'm trying to convince myself).  No, really, they are chill out sorta stuff.

Yesterday I downloaded a pattern for a ironing board caddy with thread catcher and removeable pin cushion from sew4home.com.  They have some really interesting projects, and I'll have to spend a few more hours browsing when I get a chance.  Now, I don't really need an ironing board caddy - although the idea is very good - but I use a teeny tiny board that doesn't really have enough room for such a thing - but tucking it under my sewing machine where it is easily accessable from my iron and perfect to hold my quick unpick and thread snips. 

I didn't make the thread catcher, but I did understand most of the instructions!

As far as reviewing the tutorial, I was most impressed that it had downloadable instructions, although there were 23 pages!  Lots (and lots) of pictures - so I'm not really complaining, and I printed it out with multiple pages per sheet, so only used 6 pages in the end.