Sunday, October 29, 2017

In which nothing was really achieved at all

This has been a somewhat crappy week.  Just feeling a little under the weather - nothing serious, a bit of a cold, and a general sense of exhaustion and lackluster-ness (totally a word) combined with an end of week deadline at work that drove up stress levels.

We have been (attempting to be) in full on Spring Cleaning mode as the weekend rapidly approaches when we have visitors arriving.  Of course, it has been quite a while since the last spring clean, if there has even ever been one.  We have a small house and masses of accumulated junk.  I have got sick and tired of saying "you need to clean your bedrooms" to the kids... but we are all slowly getting there.  I have a list and it is getting down to the last minute items now, so definitely progress and the end is in sight.

Our sleep-out which is normally set up to utilize the floor-space for quilt layouts and basting has a sofa-bed in the corner in the least obnoxious place.  With visitors staying for more than a couple of days, I have reorganized the space to make it somewhat appealing, and even pulled the curtains and blinds... and cleaned the windows!

This was after the major furniture had been moved around... view from the bathroom end... this is actually a decent sized room.


And looking in from my sewing shed side...


And all set up with the bed made and with a quilt (the sofa-bed is a pain in the neck to make up).  We just need a portable cot now and this will be all ready for the weekend.


In other news, I printed off the second foundation page for the Viper Quilt (Zen Chic's Bernina Triangle Sewalong) month 4 and sewed up the blocks during my unenthusiastic week.  Sorry, the pen is there to hold down a corner that wanted to curl. Aren't they perfect?


But, when I laid them next to the other blocks, they were a bit small - hmm, not so perfect.  Somehow I managed to print the foundations a different size to the first lot.


Super unimpressed with my sewing achievement, I ended up printing more foundation pages the right size, and have achieved nothing else.

In some happy news, I have had a few packages arrive in the mail. 

Well, thanks to IG I somehow mysteriously found and started following Mathew from Mr Domestic.  Mysteriously because he does both EPP and Fussy Cutting - both are techniques that I will never ever do, but he is so funny and crazy and I love him nonetheless... anyway, he was promoting some bundles he'd curated from Stash Fabrics and the rest is history.  I have learnt not to order fabric at 6am... also to not comment at 6am because what little filter I have disappears at that time of the morning.  I apologize in advance :o)

So several weeks later I had the following arrive...


Hmm, need to work on my fat quarter circle making skills...


A bit better. This bundle really includes some out there fabrics that I would never in a million years choose - but somehow I like it all together.  While I have absolutely no idea what I'm going to do with it, I am enjoying the challenge of it all.


And the second bundle... this is a little bit more me.


One of my favourite prints.

With a few of the other dreamy blues that came in the bundle.


And then I ordered another lot of sale fabric, which arrived yesterday.  Some classic Denyse Schmidt, orange Metro Rings, a great owl print, and some black RK Essex yarn dyed linen for possible clothing sewing related activities.


The owls... too cute.

And talking about possible sewing related purchases, I also ordered this fabric from Pink Castle Fabrics - Soulful Floral Universe in Plum - 3yards...


and 4yds of RK Essex yarn dyed linen in Indigo.


I have ideas about these... but all will have to wait until that sewing space it back to normal.

Perhaps linking up with Molli Sparkles.

Tuesday, October 24, 2017

Design Inspiration

I have been "being persistent" with my medallion quilt construction, using the Midnight at the Oasis pattern as my design inspiration, and feel like I am finally making progress again.  Applique borders can feel like they go on forever!  And I was really happy when I got to the end of that stage.

This is how things are looking at the moment.

Once these borders shown are complete it will measure 70" square

And this is my design inspiration.


Some people may struggle to see how the two relate, as the centre medallion is completely different, as is the next border, and I haven't really used any of the quilts measurements.  Then the applique border is similar, then I've missed a border, and made a concession also on the next border... like... is any of it the same???

I have loosely used the "idea" of the original design... starting with an orphan block as my centre, and used elements of the design that I've liked, and left out those elements I've not been so keen on.  I knew I didn't want to use the same "melon peel" design as first pieced/applique border (even though I really like it), as I felt it clashed with the shape of the applique pieces in my centre, but I liked the idea of a small pieced block, and decided to go with the butterflies instead.  This gave plenty of opportunity to add lots of colours (the centre panel only had 5 fabrics plus background), which have then been repeated in the applique, and the checkerboard borders - and looks like it is all meant to be.  I've used the sashing repeats per the original, although I have included a small coloured border in a couple of sections where I felt it needed an extra pop of colour, and also to help with sizing issues.


As the quilt has gotten larger, I decided to keep things as simple as possible, so am working on a two row checkerboard section next... (using the idea of the three row checkerboard which is in the fourth border in the original - but with a bit less fuss and definitely less matching)!  You can see how the black and white sketch fabric helps to highlight each border, and also gives a nice resting place from all the fun colours.


So what's going to come next?  Well, I am definitely not going to do this log cabin style block... that's just too much fiddley piecing as this stage of the game, and I do hope to get this finished before Xmas.  As I need to make this quilt single bed size - so turn it into a rectangle, I am going to add a pieced border top and bottom only.  The details still need to evolve.


Moving onto other news... after a bit of tidying and reorganising, my Triangle quilt has become the "Viper Quilt".

And I've got two of the Month Four blocks completed... (need to print off another foundation pattern to make the second set of blocks)...

 ... and progress so far.

And after a new shoe purchase, I contemplate at what age one should cease wearing glittery shoes?


Definitely glittery!


Thursday, October 12, 2017

FINALLY! Some Progress...

These school holidays have really knocked my routine for getting sewing done regularly.  But, today was the day, and I finally got something done.  Two things actually :o)

But first up, I did kinda promise a photo of the pinafore dress I made - with me inside it.  So here goes...

With it turning a bit more spring like weatherwise (finally) - I ended up styling it a bit more casually, still with a long sleeved merino knit underneath, but with three quarter leggings and some casual flats.  Very comfortable.

OK, on to the sewing.  When I was quilting the cot quilt, I spent a *very small* amount of time sewing down the edges of the quilt top.  I don't usually to this, and it is not normally a problem, but because I was anticipating sewing the binding on by machine - onto the back - I figured that knowing that the quilt top was fixed was a good move.  This free motion wriggle did the trick and was nice and quick.


Then I did a bit of auditioning... my original idea was a black and white binding, with scrappy peeper border.

But after buying this black and white stripe I decided to switch positions and have this as the peeper, and the scrappy be the binding.


Following the cutting instructions on the Missouri Quilt Company's you-tube tutorial for magic binding... I cut my piles of fabric...

 And sewed the two bundles together... to create my 2.5" binding strip.


Then folded the binding strip in half and pressed... just like regular binding.  But you can already see the magic starting to happen can't you?


This is the back of the binding strip and it just looks like a regular binding.


Just another picture so you can start to see how the scrappy side of things is working.


And it's all done! The binding is sewn on to the back of the quilt, and then folded to the front, and topstitched in place along the peeper/flange seamline.

 I added in some of the leftover grey squares in places where I didn't want to join two colours together.  They are also really randomly placed.


And a close up of the topstitching.  I used a 3 stitch length - thinking that there was a lot of layers to get through.  It worked out OK, and I could have probably dropped back to a 2.5.


And the stitching on the back.


You can see here that the stitching on the back is not 100% straight or even, but it did stay on the blue backing fabric.  I have high hopes that this will improve with practice.


And I used a foot I've never used before - the Blind Hem foot.  Running the blade along the join in the binding, meant that it stayed pretty accurate.


I have decided to also bind the Stack, Shuffle Slide quilt using this machine applied "magic binding" method.  So looks like I will be getting some more practice soon.

Right, the second thing I got sewn today, was my Bernina Triangle Quilt-along blocks for Month Three.

I'm pretty sure it's time for Month 4 already.

Friday, October 6, 2017

A long time coming...

The last couple of weeks have been a lot of little bits of things... we are currently in the middle of the Term 3 holidays and while I have done some sewing, we have also caught up with friends, shopping, had sleepovers and spent a *very* small amount of time at work.

I bought fabric... a couple of knits "Idle Wild birds knit in gray" by Riley Blake and "Modern Reflection Dots Knit in Grey" by Maywood Studio, planning to make a colour blocked dress... BUT the fabric is definitely t-shirt weight, and the birdie print is on a white background (somehow thought it was on a grey background)... so I've changed my plan and think I'll make a long sleeved t-shirt with it.  Currently trawling through pattern ideas, and I think I've found one I like.


In the patchwork cotton side of things I HAD to add some more Scribble Notes in White to my stash.  Then some Stella Vine Stripe in white and green, Sun print feathers in gray, Hatch crosswatch in onyx, Knock on wood sketch in dark grey, Hatch crosswatch in aluminium, Sunday Supper Grandma's gingham in pesto and Crosses in Stone.

And I added some Charm packs to my collection because, well, you never know when you might need them.


I am making a small collection of this Moda Sweetwater Sunday Supper fabric... just love those greens and blues together.


I also managed to attend my LQS's monthly Saturday stitching day, and came home with these French General (I'm pretty sure) fabrics.


A metre piece of this Sketch fabric and a button.


On the sewing side of things, I have *almost* finished my denim dress - just need to add that button to the pocket trim and finish a small amount of sewing on the straps.

I don't know that a hanger shot really does the dress any justice. It finishes above my knee - but not by too much, and will look great with tights and boots.


And you'll just have to imagine this beautiful button sewn on.


This denim was described as Rigid Denim on the bolt, and it has a slight stretch and was quite firm.  For cutting and sewing purposes, this was quite easy to deal with, as it stayed where it was put, and pressed quite well.  It wasn't the easiest to turn (like these pocket tabs) and I decided to not top stitch these as I couldn't get the points turned nicely, figuring that poor top stitching would just highlight that.  I also struggled to topstitching in some areas where the sewing machine just wouldn't feed.  In hindsight, I wondered if I should have adjusted the presser foot pressure.  I discovered that I am completely crap at topstitching curves... and am undecided whether to remove the top stitching holding the pocket on and just applique it in place.  After a good washing, the hand of the fabric has softened quite a bit, and although I haven't tried it on since, I am hoping that it will mean it has a more draped fit as opposed to looking like a shield.

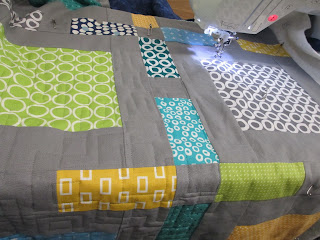
After finishing the quilting on the Stack, Shuffle Slide quilt, I basted and started quilting the Dots and Dashes cot quilt.  Although I had a few different ideas about quilting options - I ended up doing the same interlocking boxes design... I could quilt this design in my sleep, and in fact, I am sure I have dreamed about quilting it.


Stitching with this WonderFil 100wt grey thread - 103 means that the stitches are visible, but unobtrusive.

I finished up another orange block for my RSC quilt.  This was quite the challenge as it was one of the last larger blocks in the quilt.  The strips are 20.5" cut and I discovered much to my horror that I had no orange fabric of that length.  So... I did a bit of fabric surgery and added some black joiner strips.


These oranges are very ORANGE!


Linking up with the RSC and Molli Sparkles.