Living in the country we have had all sorts of animals randomly turn up in our back yard. The other afternoon it was a turkey and it's babies!
This is the view out our bedroom window. We only own this piece with the fruit trees on it - the surrounding paddocks belong to the neighbours and do occasionally have cows in them.
Progress is being made in "Operation Reorganize the Sewing Cave".
I have a new FMQ area...
And a new setup for piecing.
The stash cupboard is all beautiful and organized again (although I should go through the fat quarters in the bins and make some sort of sense of them...). The shelves towards the top have pieces larger than a fat quarter, and the bottom shelf holds larger yardage, as well as other substrates.
These are my bulk scrap bins and a shelf of projects waiting to be FMQed, and look... a spare shelf. Coincidentally I have more projects to add to that FMQ pile so guess what is going to fill this space!
Unfortunately the other side of the sleepout still looks like this - although I have emptied out the dresser, and when it stops raining, it will be moved into Dylan's room, which will go a long way to clearing this room up.
And although I cleared away most of the fabric stash, I still seem to have a whole counter full of other stuff! I have been transferring WIP's into the fabric boxes held on the white shelf units, and right down the end I have sorted my collection of patterns and assorted bits of paper printed and collected over the years.
My hubby is the best. He bought home these packing containers that were going to be thrown out (in the background you can see my mini scrap storage containers).
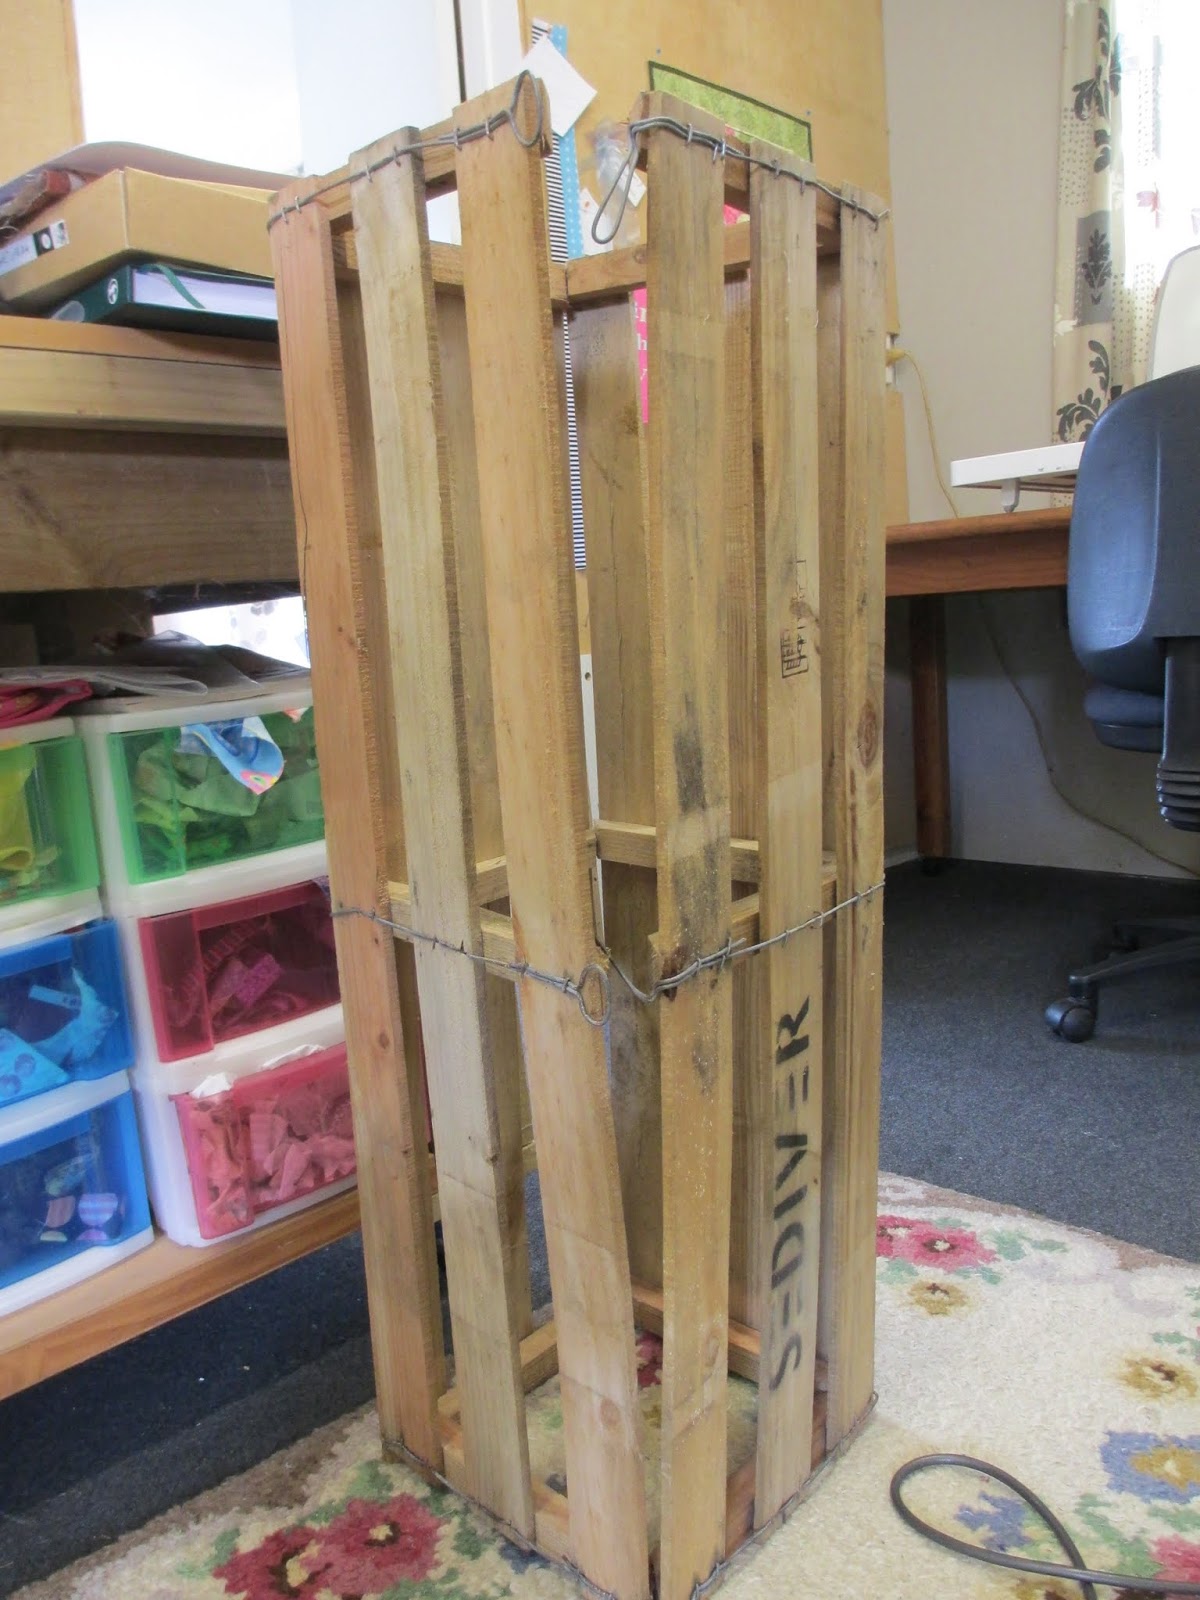
Unfolded they look like this.
And after a little bit of time they turned into a cool shelf! These are mostly filled with scraps awaiting sorting at the moment, but I'm not planning on this being permanent. I am also planning to return the freezer to my main cutting zone as it is the perfect height. Next he is going to make me another shelf - one with more shelves which "we" will attach to the wall above the large bench, to hold a myriad of small objects.
Last year was the year of the Epic Quilt. And I made really good progress on two massive projects. I'm wondering if this should be the year of the Sampler Quilt.
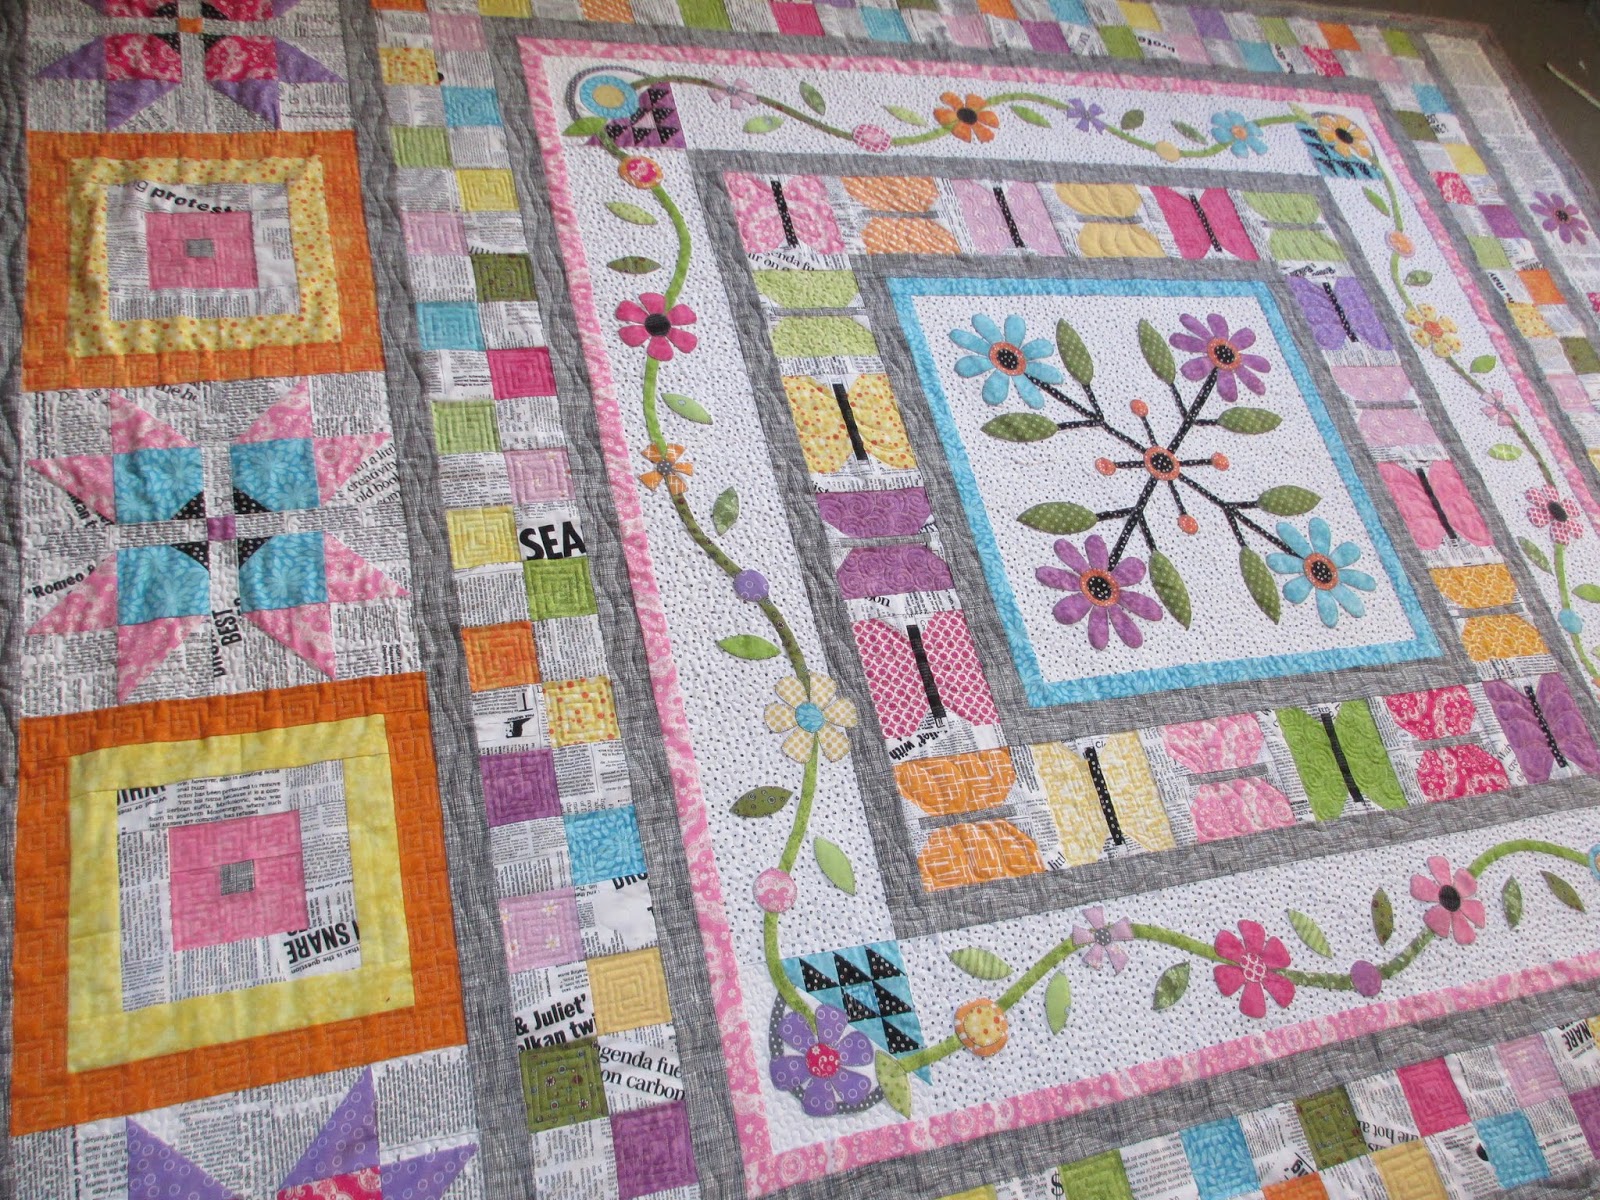
Amongst my sorting out - I uncovered this project from a few years ago. The Friends mystery stitchery by The Country Yard, which came with a relatively simple quilt layout.
Of course, I decided to make a whole heap of other blocks and make it way more confusing... and put it away for another day... or rather... year.
The pieced blocks so far. I started making these when I was feeling a bit blah about quilting, and found the low commitment of making single blocks was quite therapeutic.
The exciting thing is, is that with my new sewing space layout, the design wall is completely free of clutter - and I had figured out that I needed to lay this quilt out to be able to keep it balanced, but also make sure that the key blocks were going to be towards the centre of the quilt (on the bed top) as opposed to hanging over the edge of the bed. Part of the reason it sat around for so long.
So I measured out roughly where an 80x80 square would sit - and measured about 10" in on the sides and marked the centre, and started placing the major blocks. This is also where I figured out I will need a whole heap MORE blocks!
But on the positive side I have now pieced a central panel which is 24x31"!
I altered one of the original stitched blocks to better represent our family at the time (whanau means family in Maori). [I still have the spotty gumboots, but Dylan now wears the same size as hubby, and Nadia's feet are way bigger than mine and I don't think she would be caught dead with gumboot with flowers on them!]
So this quilt is now our Whanau and Friends Quilt.
Now to make eleventy million other blocks... oh, and finish tidying up :o)
Where I share my projects; the progression from start to finish (often with more in the starting department, and less in the finishing)
Thursday, January 4, 2018
Monday, January 1, 2018
Happy New Year!
Welcome to the start of a new year! I feel like I should have lots of plans, and be organised and have lists and words... but somehow I'm not quite ready to start thinking about those things yet.
Before the end of the year, I did manage to get my RSC quilt top sewn together. This had stagnated somewhere around the "pink" month... and even though I only had 6 blocks to get finished, I found it quite hard to get enough motivation to finish these up. Of course, once I had started, it was easy to finish off and get this top done.
Adding in a few pink blocks helped to tie in the pink elements included in the "multicoloured" blocks.
I also made some "neutral" blocks with black/white and grey fabrics.
Needing to make another baby quilt - for a teeny tiny baby girl this time, I picked up my Growing Up Modern book by Alison Harris.
I have always liked this Breezy quilt, but it had never quite worked out before.
Using a bundle of 21 x 3" strips in a mix of purple, blue and turquoise (leaving out the raucous green with gold overlay ones *shiver in horror*), I laid the strips out in a soft gradient and altered the cutting instructions from the 2.5" cut strips in the pattern, to suit the 3" ones I had on hand. I also used the full width of the strips, making a quilt 50" wide, and added a plain border top and bottom making it about 64" long. A generous baby quilt size.
The fabrics are pretty, but not my style at all. I have had this bundle for at least 8 years (before I learnt that being a fabric club member was not my thing)... and figured one day I would find the perfect project for it. Looks like 2018 was that time! Plain grey and navy homespun created the ideal highlights.
And I found a piece of floral fabric to use as the basis for the backing...
... which along with a few other fabrics will make a backing big enough, and pretty enough also.
In other news, I have been reorganising my sewing shed... moving large furniture items, which meant taking out all the stuff in those large furniture items first! Including my fabric stash...
Some of the furniture has been temporarily jammed into the sleepout...
But we managed to get things shifted around, and now I just need to clear off the surfaces and fine tune the storage of all those other little bits and pieces we seem to collect.
Before the end of the year, I did manage to get my RSC quilt top sewn together. This had stagnated somewhere around the "pink" month... and even though I only had 6 blocks to get finished, I found it quite hard to get enough motivation to finish these up. Of course, once I had started, it was easy to finish off and get this top done.
| I have since added a 5" black border to the sides making it 62x82" |
Adding in a few pink blocks helped to tie in the pink elements included in the "multicoloured" blocks.
I also made some "neutral" blocks with black/white and grey fabrics.
Needing to make another baby quilt - for a teeny tiny baby girl this time, I picked up my Growing Up Modern book by Alison Harris.
I have always liked this Breezy quilt, but it had never quite worked out before.
Using a bundle of 21 x 3" strips in a mix of purple, blue and turquoise (leaving out the raucous green with gold overlay ones *shiver in horror*), I laid the strips out in a soft gradient and altered the cutting instructions from the 2.5" cut strips in the pattern, to suit the 3" ones I had on hand. I also used the full width of the strips, making a quilt 50" wide, and added a plain border top and bottom making it about 64" long. A generous baby quilt size.
The fabrics are pretty, but not my style at all. I have had this bundle for at least 8 years (before I learnt that being a fabric club member was not my thing)... and figured one day I would find the perfect project for it. Looks like 2018 was that time! Plain grey and navy homespun created the ideal highlights.
And I found a piece of floral fabric to use as the basis for the backing...
... which along with a few other fabrics will make a backing big enough, and pretty enough also.
In other news, I have been reorganising my sewing shed... moving large furniture items, which meant taking out all the stuff in those large furniture items first! Including my fabric stash...
Some of the furniture has been temporarily jammed into the sleepout...
But we managed to get things shifted around, and now I just need to clear off the surfaces and fine tune the storage of all those other little bits and pieces we seem to collect.
Friday, December 22, 2017
Pre-Christmas Progress amongst the Pre-Christmas Madness
As I technically finished work on the 7th of December (to coincide with the beginning of school summer holidays), I figured that I had plenty of time to then finish the Medallion quilt by the 20th of December, when the office actually closed so I could pass it onto it's recipient as promised. Little did I realise that of those 9 work days in between, I would spend 6 of those days at work. Between working (both at home and at the office) I pushed and pushed (and sweated and sweated - it's been flipping hot here in NZ) and finally got the medallion quilt finished. This was a true whoop whoop moment.
I did a mix of stippling the black and white prints... and quilting the coloured sections.
And used the magic binding technique using a scrappy peeper, with the Sketch as the binding portion. Looks like a really complicated piping treatment, but I can only be thankful that the Sketch hides a multitude of sins.
From the back.
I placed my label so that it would get sewn into the binding... and just needed to handstitch the three sides after it was completed. This ensures no little fingers could get caught in an unsewn loop.
Having quilting free areas means a bit of puffiness... sometimes this is good...
And sometimes not so good.
If I had more time I would have quilted more areas, and not had this problem. I thought about adding some feathered sections to the pink parts of the star - most of these sections sat flat with a bit of encouragement - but just ran out of time.
Now that this project is crossed off the list, I got back to sewing my Sew House Seven "The Tea House Top and Dress".
You can see from the line drawings that this pattern has seams through the front that give it shaping, and that the pocket sides are caught in this seam, as well as the side seam. There is a choice between side ties that are also sewn into this seam, or a back tunnel that captures a narrow tie, that can then be tied to the front.
I've got far enough through the process to be able to try it on... still need to finish some seams, and hem the bottom and the sleeves.
With this very drapy rayon the pockets just sort of hang in a somewhat depressed sort of way - interestingly each side hangs slightly differently. Rayon is actually one of the fabrics recommended on the pattern packet - but I accept that some rayons are more drapey than others, and I think this rayon is just a bit too much.
I never did quite get the back yoke to sit properly. To be honest I kinda hate the back of this dress - it is very smock like, in a 90yr old granny sort of way. My poor sewing skills have done it no favours.
I chose to alter the ties - I really dislike having wide ties that you do up at the back - I always find they sit right on a back bone and dig in. But I am also not a fan of ties that come around to the front. So, I narrowed the ties on the front...
And also added the ties to the back... so that I could tie it up at the sides.
Regardless of the shaping of the dress - it is actually the ties that give it any shape at all. The built in shaping from the seams creates fullness in areas where I don't seem to be all that full.
I think I bit off more than I could chew with this pattern - both with the design and the fabric choice. I'm not sure whether I will wear it if/when it gets finished, but I'm planning a slight hi/low hem line - and am omitting the cuffed sleeves - they will just get a narrow hem and we'll call it done.
Lesson's learnt - remember to look at the line drawing in detail before deciding to buy a pattern based on what the sample looks like. Also, do the fabric wrinkle test in the shop - and remember that even expensive rayon is not worth the angst.
I did a mix of stippling the black and white prints... and quilting the coloured sections.
And used the magic binding technique using a scrappy peeper, with the Sketch as the binding portion. Looks like a really complicated piping treatment, but I can only be thankful that the Sketch hides a multitude of sins.
From the back.
I placed my label so that it would get sewn into the binding... and just needed to handstitch the three sides after it was completed. This ensures no little fingers could get caught in an unsewn loop.
Having quilting free areas means a bit of puffiness... sometimes this is good...
And sometimes not so good.
If I had more time I would have quilted more areas, and not had this problem. I thought about adding some feathered sections to the pink parts of the star - most of these sections sat flat with a bit of encouragement - but just ran out of time.
Now that this project is crossed off the list, I got back to sewing my Sew House Seven "The Tea House Top and Dress".
You can see from the line drawings that this pattern has seams through the front that give it shaping, and that the pocket sides are caught in this seam, as well as the side seam. There is a choice between side ties that are also sewn into this seam, or a back tunnel that captures a narrow tie, that can then be tied to the front.
I've got far enough through the process to be able to try it on... still need to finish some seams, and hem the bottom and the sleeves.
With this very drapy rayon the pockets just sort of hang in a somewhat depressed sort of way - interestingly each side hangs slightly differently. Rayon is actually one of the fabrics recommended on the pattern packet - but I accept that some rayons are more drapey than others, and I think this rayon is just a bit too much.
| Not only does the top of the pocket drape down, but the fullness of the pocket drapes down over the bottom stitching lines. |
I never did quite get the back yoke to sit properly. To be honest I kinda hate the back of this dress - it is very smock like, in a 90yr old granny sort of way. My poor sewing skills have done it no favours.
I chose to alter the ties - I really dislike having wide ties that you do up at the back - I always find they sit right on a back bone and dig in. But I am also not a fan of ties that come around to the front. So, I narrowed the ties on the front...
And also added the ties to the back... so that I could tie it up at the sides.
Regardless of the shaping of the dress - it is actually the ties that give it any shape at all. The built in shaping from the seams creates fullness in areas where I don't seem to be all that full.
I think I bit off more than I could chew with this pattern - both with the design and the fabric choice. I'm not sure whether I will wear it if/when it gets finished, but I'm planning a slight hi/low hem line - and am omitting the cuffed sleeves - they will just get a narrow hem and we'll call it done.
Lesson's learnt - remember to look at the line drawing in detail before deciding to buy a pattern based on what the sample looks like. Also, do the fabric wrinkle test in the shop - and remember that even expensive rayon is not worth the angst.
Sunday, December 10, 2017
FMQ... Bring it on!
The medallion quilt is all basted and FMQ has started! With a pre-Xmas deadline... this one will be a tight finish, as I'm not known for my quick quilting skills :o)
The backing fabric is a pretty wide back from Spotlight. Even though I really like it, and it works terrifically with the front - I can't help but wonder if it is slightly creepy.
Although the Invisifil thread I've used on the centre white section broke ALL. THE. TIME. I finally got this bit finished stitching at a seriously reduced speed. So hard to get nice curves and even stitching going this slow.
Switching to another thread, I did a variety of fillers on the butterfly wings... spirals...
Feathers...
Sort of a greek key design...
And a stipple following a wiggly stem...
The grey border/sashing I have done a couple of FMQ wiggly lines. I'm thinking about making this three lines, although you can hardly see it on the front, hence the back shot.
And the threads... a grey Wonderfil Invisifil 100wt in the sashing and a pretty pastel 40wt Gunold thread in the butterfly border. The thread that keeps breaking is an off-white Invisifil on a cone. The grey thread has been fine. One of the mysteries of FMQ.
The first day of the school holidays is traditionally tree trimming day. Nadia was in charge this time, although I heard Dylan giving his opinion along the way. This year it is all about the tinsel and the lights... hardly any decorations. Well... it does look pretty!
The backing fabric is a pretty wide back from Spotlight. Even though I really like it, and it works terrifically with the front - I can't help but wonder if it is slightly creepy.
Although the Invisifil thread I've used on the centre white section broke ALL. THE. TIME. I finally got this bit finished stitching at a seriously reduced speed. So hard to get nice curves and even stitching going this slow.
Switching to another thread, I did a variety of fillers on the butterfly wings... spirals...
Feathers...
Sort of a greek key design...
And a stipple following a wiggly stem...
The grey border/sashing I have done a couple of FMQ wiggly lines. I'm thinking about making this three lines, although you can hardly see it on the front, hence the back shot.
And the threads... a grey Wonderfil Invisifil 100wt in the sashing and a pretty pastel 40wt Gunold thread in the butterfly border. The thread that keeps breaking is an off-white Invisifil on a cone. The grey thread has been fine. One of the mysteries of FMQ.
The first day of the school holidays is traditionally tree trimming day. Nadia was in charge this time, although I heard Dylan giving his opinion along the way. This year it is all about the tinsel and the lights... hardly any decorations. Well... it does look pretty!
Sunday, December 3, 2017
Slow Sewing
As I approach clothes sewing projects now, I feel like I have a lot more patience and respect for the preparation side of the project. With space set aside where I don't have to rush to get things laid out, pinned and cut in a short period of time (to allow TV viewing or life in general) - I can take my time, really trying to achieve a good result, and knowing that I can continue tomorrow if needed.
So it's been a quiet week of laying out fabric, cutting out pattern pieces and slowly working my way through the early stages of my dress pattern - stay stitching and those other weird practices that I always ignored in the past. For some reason my Bernette sewing machine has hated sewing the rayon fabric I am using... so much to my disgust, I had to resew several sections where the sewing gathered up and the tension was crappy. Luckily, my Brother Innovis was much better behaved. I did end up with this rather oddly shaped yoke section.
This has knocked my confidence a bit, and I'm not sure now whether I'm going to like the finished product. I have remembered why I don't like sewing with Rayon - it is just a beast to handle. At this stage, all I can do is continue and hope for the best.
In general sewing shed news, I finally decided to remove the frame from my enormous custom built work desk, and use this space as work space - instead of general junk holding space. I think this is about 3m long.
I also added a few new fat quarters to my stash... thanks The Country Yard!
And I added some new Denyse Schmidt patterns to my collection after a Black Friday sale with Hawthorne Threads. Best of all, they don't charge freight on their pattern purchases... and these are some patterns I've had on my wish list for a while.
I have struggled with getting the last border done for my Medallion quilt. Losing the fabric, and then the fusible web meant it was all just too hard. Yesterday I played with some fonts and poster printing...
And after finally tracking down the other supplies I needed, fused and laid out the letters. This is a 5 1/2" cut strip.
I think this will work :o) Bring on the blanket stitch next week, when it is hopefully not too hot!
So it's been a quiet week of laying out fabric, cutting out pattern pieces and slowly working my way through the early stages of my dress pattern - stay stitching and those other weird practices that I always ignored in the past. For some reason my Bernette sewing machine has hated sewing the rayon fabric I am using... so much to my disgust, I had to resew several sections where the sewing gathered up and the tension was crappy. Luckily, my Brother Innovis was much better behaved. I did end up with this rather oddly shaped yoke section.
| Pretty sure this is supposed to lay flat. |
| Resewing has meant that it does indeed sit flat - although there are still the odd funny bits, I'm calling this a win. |
This has knocked my confidence a bit, and I'm not sure now whether I'm going to like the finished product. I have remembered why I don't like sewing with Rayon - it is just a beast to handle. At this stage, all I can do is continue and hope for the best.
In general sewing shed news, I finally decided to remove the frame from my enormous custom built work desk, and use this space as work space - instead of general junk holding space. I think this is about 3m long.
I also added a few new fat quarters to my stash... thanks The Country Yard!
And I added some new Denyse Schmidt patterns to my collection after a Black Friday sale with Hawthorne Threads. Best of all, they don't charge freight on their pattern purchases... and these are some patterns I've had on my wish list for a while.
I have struggled with getting the last border done for my Medallion quilt. Losing the fabric, and then the fusible web meant it was all just too hard. Yesterday I played with some fonts and poster printing...
And after finally tracking down the other supplies I needed, fused and laid out the letters. This is a 5 1/2" cut strip.
I think this will work :o) Bring on the blanket stitch next week, when it is hopefully not too hot!
Subscribe to:
Posts (Atom)