Just to jog your memories...
 |
| This was actually a pre-finished photo - quilt is currently in the washing machine. |
* first time using feathers on an actual quilt... and jumbo size ones at that
* first quilt so BIG... while many of my quilts are on the large side, this is certainly the biggest so far (note to self - remember to make them smaller in future!)
* first time successfully doing machine applied binding! Woot!!
I didn't do the machine applied binding quite the way Ms Lottie had taught us... as I'm not a good student and didn't want to pin right the way around the quilt - I'm not greatn at pinning accurately, plus I'm not the greatest at ironing evenly, let alone stitching accurately.
My solution:
 |
| Firstly, I cut my binding 2 1/2" just like normal, folded in half, and applied to the back of the quilt and followed the usual instructions, doing the little fold one way, then fold the other way at the corners to make the mitred bit. I also used a 1/4" seam using my normal 1/4" foot (which is how I do my binding anyway - never had any trouble). |
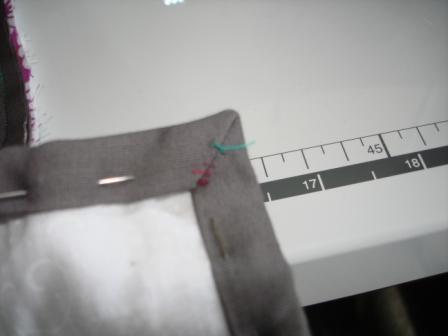 |
| Sorry this photo is a bit dark and blurry - but then I turned the binding to the front aligning it slightly over the stitching line, and pinned just two pins in each corner, before playing around with the actual corner mitre until I was happy with it, then used a needle and thread to put about four stitches through the corner to hold in place. Did this for all four corners and is something I would recommend for anyone doing any kind of method of machine binding. |
 |
| Starting on a long straight edge, I wrapped the binding towards the front - again using the stitching line as the guide so that the edge of the binding just covered it, then using my normal old 1/4" foot, lined up the left hand side of my foot (which has a 1/8th inch width from the edge to the needle) with the original fold in the binding (the left hand side of the binding in the picture). Keep going to the corner mitre, needle down in the corner and pivot. Keep on going! Make sure that binding is pulled out to the right firmly before you fold it over. If I was doing something smaller, I probably would iron first from the wrong side of the quilt pressing the binding out, to give the back a neater seam line. |
 |
| Gives a top stitched effect on the front... |
 |
| Corners on front are pretty good... although not perfect |
 |
| Corner on back OK, and a topstitch finish on this side also. |
Nothing beats a hand finished quilt... but I do agree that there is a time and place for machine applied binding - now that I've found a method that suits me, I will definately be doing it again.
I've also been playing with names for this quilt... and am thinking
"What the F.... feathers"
might just be the winner.

