Wednesday, July 30, 2014

A bit about stack and slash

Buggy Barn quilts are well known for their use of the stack and slash technique.  Their designs are wonderful, often complex, need careful fabric planning and layout management, but are on the whole easy to piece and well worth the effort.  Their cat quilt is a great example.

This fabric had pineapples on it... but don't they look like ticks?
 These designs come with a paper cutting layout which you trace onto freezer paper.  Your fat quarter sized fabrics are stacked, faceup, in the order you want, with the freezer paper template ironed to the top fabric.  Then it's a matter of following the numbers, slicing through the layers of fabric to create smaller and smaller shapes (very similar effect to paper pieced blocks).  The next trick is to restack the piles so that the different design elements appear... in this case, the cat appeared - complete with stripes, nose, cat body/head and background.  In this example, each block uses four different fabrics.  The initial stack layers determines which fabrics appear in each block - and it's important to layer your fabrics so that you get good contrast between the elements.  Make sense?

Now onto the There's a Square in There Pattern.  This uses much the same technique only much much simpler.  There is no intense layering and no paper template.  Instead, there are four different diagrams for the irregular log cabin blocks, each of which require four fabrics - two pattern and two plain.  The squares of fabrics are layered in order, face up, alternating plain and patterned fabrics.  The diagram describes the order of the cuts in black, with the size of the cut in blue.

In case you're wondering, I don't think this was the diagram I was following for the block cutting illustrated... and I may or may not have made a mistake with the cutting... however, the instructions also say that it is quite OK to make your own decisions about cutting... there is no right or wrong.

Here's my pile after the first round of cuts (the first cut is shown along the bottom).


Then I made the second round of cuts and reshuffled the second round, moving the top fabric to the bottom of the pile to reveal the orange logs. 


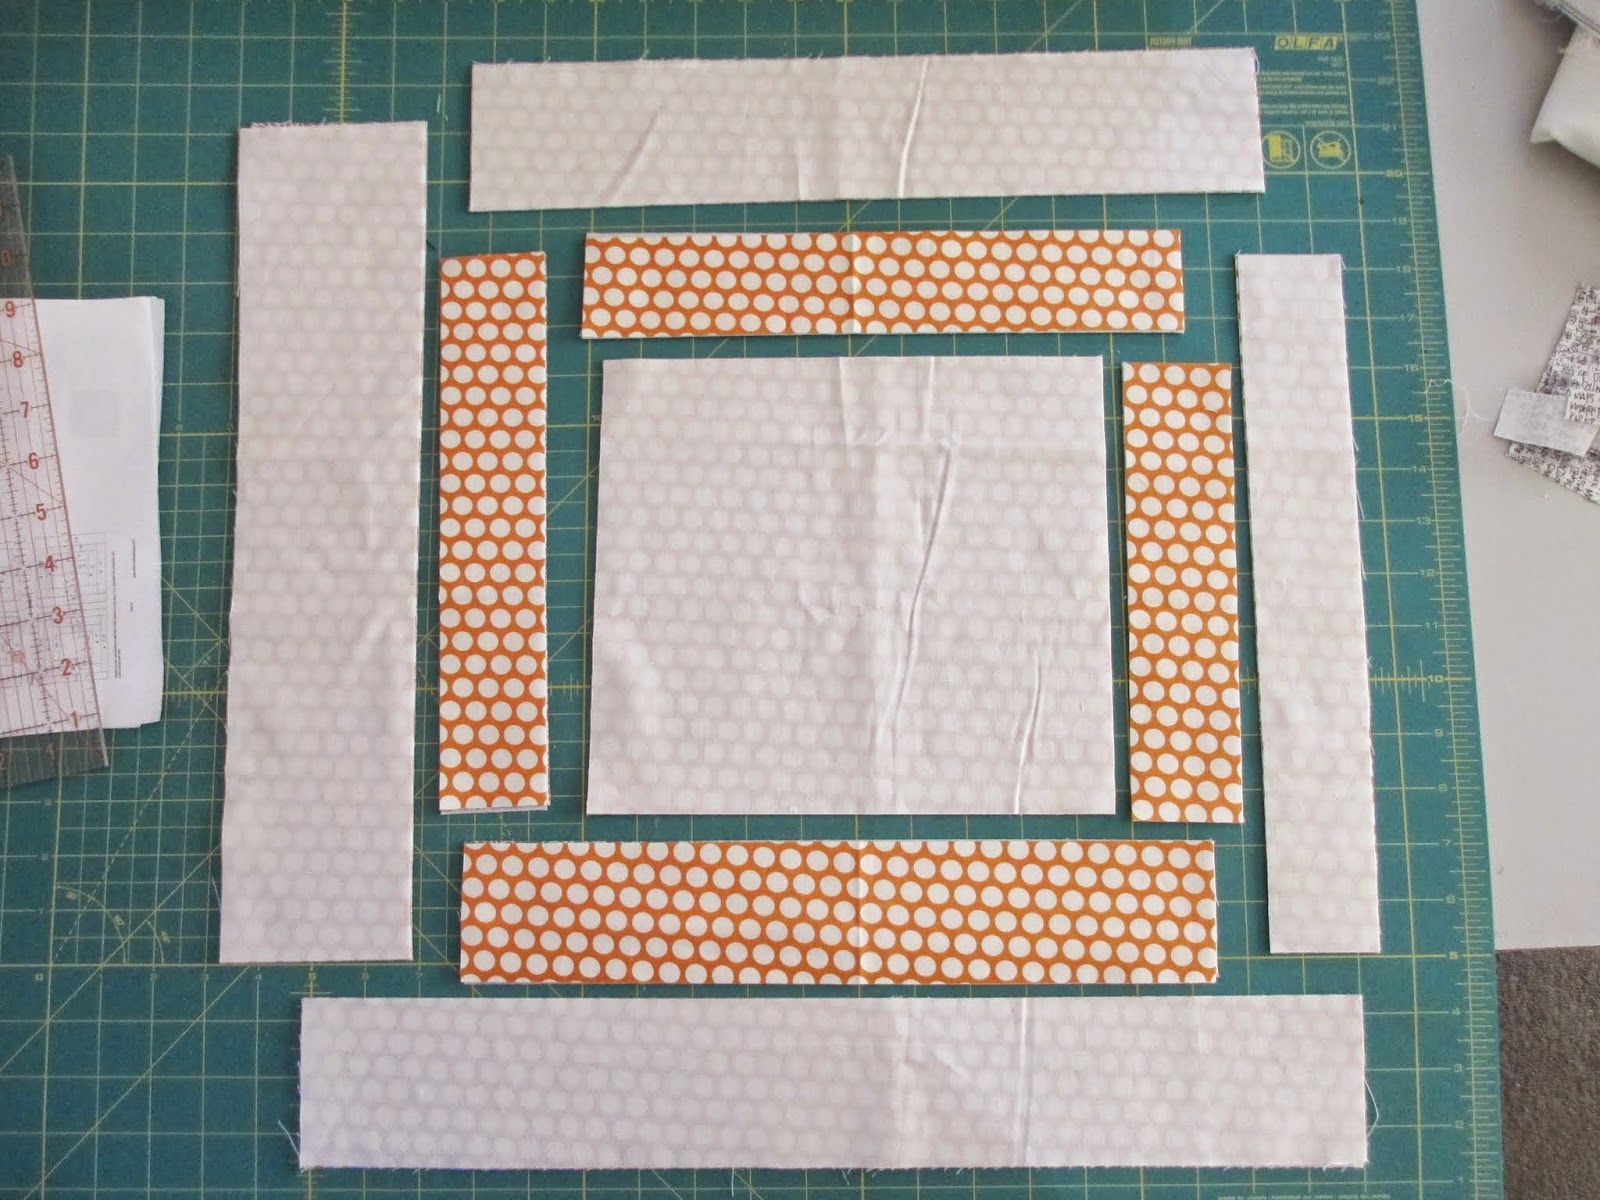
Then the last round of cuts... the third round stays plain, but if I left the pile without shuffling it, then when I got to the patterned fabrics, I would end up with two rounds matching, so I shifted two layers of fabric to the bottom of the pile, and a reshuffle for the centre rectangle, bringing the bottom fabric up to the top.

It helps to keep it laid out in order.  No wind, kids, cats or husbands tidying please.

Now we're ready to start piecing.  It's a matter of attaching the rounds in the opposite order to how they were cut.

The first piece matches perfectly...

But when you go to attach this unit to the next log, there is a bit of a size difference - the seam allowances.  This is how the technique works... you will need to trim.

 I sew the logs on first,

See the overhang on the left?

 then trim the overhang off later.


And once that log has been opened out, we can see that the mismatch continues, the next log will be too long... and in fact, every piece will need to be trimmed down.  Once you get your head around that, it is smooth sailing.


Because I decided to add in an alternate fabric every now and then, I swapped the plain piece I had already cut, and added the text instead.


And my four blocks from this pile, all with their first rounds added.


Round two will continue tomorrow.

So, have you ever made a stack and slash quilt?  Did you enjoy it?

Sunday, July 27, 2014

Getting back on the horse... or bicycle... or sewing machine

It's been a pretty much sewing free week.  Heading back to work complete with flu bugs, head cold and cough meant that after work entertainment included collapsing into a chair and doing as little as possible.  It also gave me time to think and reassess fabric, sewing and life in general.  It's pretty low when you complain about fabric arriving!

Saturday it was time to get back into the saddle.

My LQS has a monthly stitching Saturday - last Saturday of the month; and I knew that the time spent away from household chores (which despite my best efforts were mounting), amongst like minded lovely ladies, in a shop full of gorgeous fabric, was just what I needed to restore my inner equilibrium.  I was right.

I took an old FQ bundle (Eiko by Jay-cyn Designs) which has been lurking in my stash cupboard since September last year,

with plans for a new project, There's a Square in There by Kate Conklin Designs.


 - nothing too complicated or testing, but good old enjoyable sewing.  This quilt is cut in much the same way as the Buggy Barn stack and slash quilts... with a pile of two printed fabrics, and two plain fabrics turning into four log cabin style blocks.  With my eight fat quarters, I have enough to make the design as shown (16 blocks).  Although I've increased the size to use as much of the fat quarter as possible, which means roughly 15" finished blocks instead of 13" per the pattern.

My first stack... still to be trimmed down:


Every now and then I swapped out the plain strip, and added a bit of text fabric.


And my second stack has the last round of logs to be sewn on.  Not a bad start.

OK, I'm starting to feel more like myself now :0)

I bought a pattern I've loved since I first saw it... by Edytar Sitar.


This is my inspiration for wanting to add applique to my Double Wedding Ring blocks.  Today I was lucky enough to be able to select some batik fat quarters to blend with my patterned fabrics... I am very happy with my selection, although I'm still not 100% certain how it is all going to work out.


I've also been pondering about what colour background to use for the Supernova blocks on my design wall.


Did anyone else order from The Fat Quarter Shop's 25% off sale a few weeks ago?  I decided to order some black on black prints from their Muslin Mates range, and make the decision to go black on this one.  The prints are more charcoal on black... but I think they'll still work fine.  I need to go through my stash and pull out some more black prints - I know there are more hiding in there.

These are really black in real life
During the holidays, I did manage to sew the second block of Amy Gibson's Sugar Club BOM, which I'm using a variety of Bonnie & Camille fabrics.


And the first block in all its matching wonderfulness:


OK, that's me all caught up... focus for this week is to make progress on the log cabin blocks. I've already ordered a backing for it... so wouldn't it be funny to have the front finished before the backing arrives?

Monday, July 21, 2014

The Problem with International Postage

Apart from the cost, is that you never know when it's going to arrive!

Pre holidays... I had a couple of weak moments.  You know the ones... "this item on your wish list is on special..." or guess what, one of your fav shops has a special on top of a special... but it was OK, because the fabric diet was *almost* over, and it was going to be school holidays, when I desperately need new reading material, new material, or just anything new.  The weather was appalling... perfect for curling up with new books or for playing with new project ideas.

BUT it just didn't work out that way.  The books arrived in unsatisfying dribs and drabs... with the fabric and the last few books coming just a day before school and work started back.  Grrr.

So a round up of online international purchases... drum roll please...

First up... the books.  Book Depository is my friend.  Not necessarily my Visa's friend.
 Key words: Bright, Applique, Fun.


The cover quilt in full


Fabric... when life gives you bundles on  special... Pink Castle Fabrics is my friend too.

Savannah - love the bright (but not too bright) citrus colours and the slightly retro feel...


Color Love by Nancy Rink.  This one is a little more out of my comfort zone - look people, Pink! and Navy!  I love the feature floral, and I'm sure the others will grow on me.  One of the joys of buying a bundle.  I'll have to try taking a better photo...


And a few odds n ends... including more of that feature floral.  Which I love.  Did I mention that?


I'm still feeling unsatisfied.  I think I over-anticipated how great/perfect it was all going to be/feel.  Does that ever happen to you?

I'm also sick, and have just had the first day back at work after the holidays.  Some things just suck.

Thursday, July 17, 2014

Small increments of change

A bit more planning and block construction later... can you see where I'm heading here?

BEFORE:

Feeling a bit dark and heavy...


AFTER:

... a bit more light and airy.

Getting better.  In this layout I still would change the third block in from the left on the top row... and obviously, I need one more 6" block to fill the hole on the bottom right.  The empty space under the stitchery will be filled with either flying geese, or applique leaves... haven't decided yet.  BUT I am happy to continue on and make some more blocks, and then mix them up even more!

Wednesday, July 16, 2014

Nuances of Light and Dark

The kids made up a To Do list for the holidays.  Of course, the powercut, then the flooding, then the blocked main arterial roads have put a bit of a damper on things... but we have managed to tick off a few items:

No 3: Do some baking.  Made Amy Gibson's chocolate chip cookies yesterday with Dylan, and a Takaka Ginger Crunch (that came up as a google search) with Nadia.

No 9: Make own dinner.  Pizza night - so the industrious duo were chopping onions, salami, ham steaks, opening the pineapple tin, chopping mushrooms and grating cheese.  All I had to do was make the base, supervise even sprinkling, and put it in the oven.

No 12: Go to the library.  Never a problem for me :0)

Tomorrow we'll cover No 15: Go to a friends house, when we go to visit Charlotte.


Steps to the altar

The blocks just keep on coming, I can add some 12" blocks to the list.  I've unrolled the other French General jelly roll that's been sitting in the stash for a few years - Lumiere de Noel.  It has the same red as the Chateau Rouge prints, and  a very similar style.  It adds heaps more cream and beige tone on tone prints to the mix, which gives me a lot more flexibility.


Antique tile
One of the problems of working with a jelly roll is that, if you were choosing the fabric yourself, you wouldn't necessarily of chosen all of those fabrics, to go with all of those fabrics.   In fact, I'm sure that the designers didn't make the different colourways with the intention of sewing them all together.  What do you really do with 7 different red on red prints?

I found that my blocks were becoming a bit harsh, either with very strong light and dark contrast, or tending to go a bit Darth Vaderish... towards the dark side.  While there is nothing wrong with that (unless you are Luke Skywalker), this wasn't the way I envisioned the final quilt looking.

Hourglass I

I'm a lot happier about the subtle nuances of colour I can now include.  See, this block has the same floral feature fabric... but a much softer feel.  These will slot nicely in amongst the other ones I have made.

Grandmother's Choice

Old Maid's Puzzle

Texas star

Coxey's army - well, pretty much - I had to make a few adjustments due to fabric limitations

Do you have a favourite block?

Edited to add: Linking up with Lee at Freshly Pieced

Monday, July 14, 2014

And so it continues...

Well, it's going to be continuing for quite some time looking at my progress, but you can get the general idea. 

Not even 1/4 of the final quilt layout
I have 6", 8" and 10" blocks, then a 9.5" and an 11".  In this possible layout, the gaps would be filled with small filler strips - maybe flying geese, four patches or plain strips... depending on the exact size.  On the one hand, it is quite freeing not being too worried about the finished sizes of blocks at this stage of construction - but it's definitely a "will need to worry about it later" kind of thing, when it's time to sew everything together (like how did I end up with 9.5"  & 11" blocks, and how will they ever play nicely with the other blocks which are all divisible by 2).  I do however have great "quilt" faith, and I'm am positive it will all work out in the end.


As a starting point, I've been working from this block book, 200 Quilt Blocks to Mix & Match by Davina Thomas, which is probably one of the first quilting books I bought.  It was published in 2005 - and has a rather faded cover.


The instructions are brief and to the point.  You really need to have some idea of how it all goes together to have any success with this book (which may explain why it's taken me 9 years to create something out of it). You also need to ignore the sometimes ugly fabric combinations.  Really??


I decided I probably should name the blocks as I go, for posterity... some of my favourites so far:

Sisters Choice, which I both like, and thought the name was appropriate for a Friends/Whanau quilt.  Although I don't have any sisters... I do have five sister-in-laws.


Sashed Triangles... wouldn't this make a cute scrap quilt block...


I ended up adding strips to the Share embroidery, with the intention of adding star points, or making it a square in a square... but I kinda just like it the way it is... so it can stay like this for a while.


I just love the simplicity of this one, Jacks on Six... another great scrap quilt block - I can just see it with sashing and cornerstones... this is how I end up with 101 different quilts started at once.


I've rather taken over the dining table and kitchen at the moment... although it is frustrating having to pack everything up at the end of the day.  It does make me happy that I have my own sewing space, where it doesn't matter too much how messy I leave it - and will disappear back into my cave when the holidays are finished.

Luckily the bad weather that has been causing such chaos in Northland moved on during Friday night, and we woke to an absolutely banger of a day.  Although there was some rain both Saturday and Sunday, the bulk of the time it has been just as beautiful.