Showing posts with label Sew House Seven patterns. Show all posts

Friday, December 22, 2017

Pre-Christmas Progress amongst the Pre-Christmas Madness

As I technically finished work on the 7th of December (to coincide with the beginning of school summer holidays), I figured that I had plenty of time to then finish the Medallion quilt by the 20th of December, when the office actually closed so I could pass it onto it's recipient as promised.  Little did I realise that of those 9 work days in between, I would spend 6 of those days at work.  Between working (both at home and at the office) I pushed and pushed (and sweated and sweated - it's been flipping hot here in NZ) and finally got the medallion quilt finished.  This was a true whoop whoop moment.

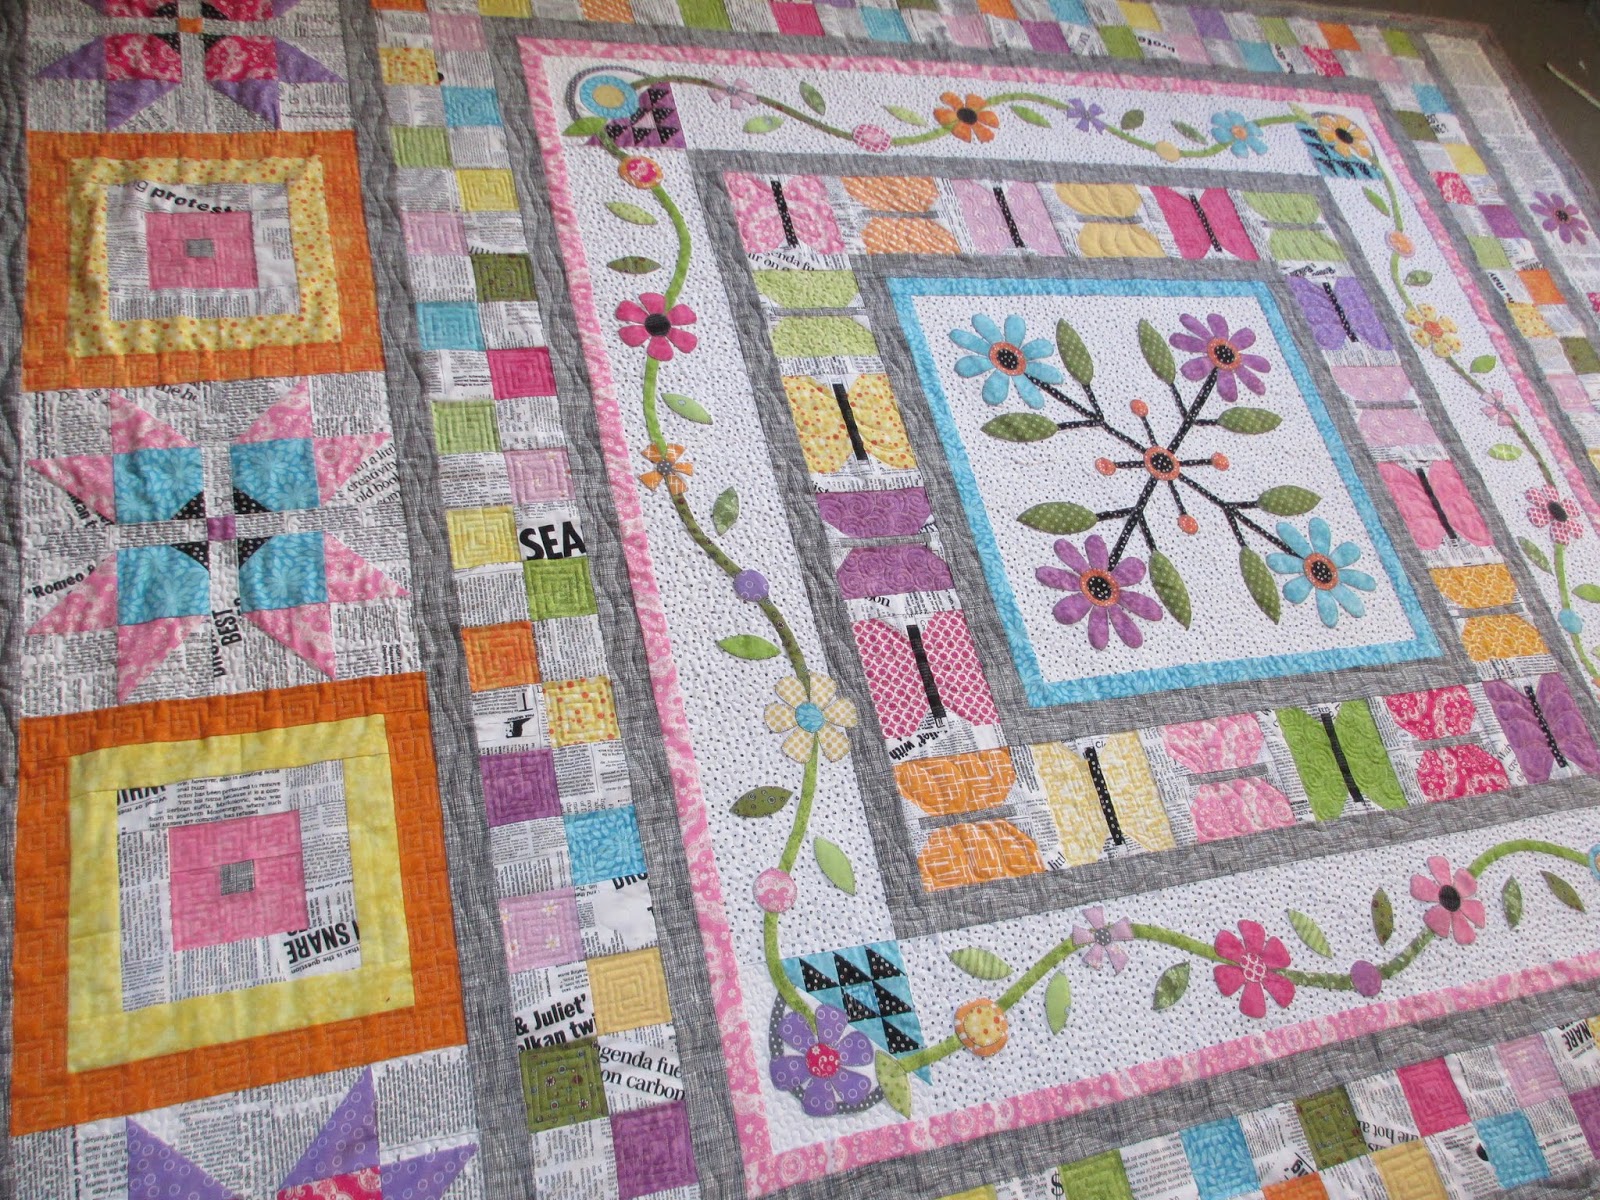
Measuring around 68x89" it is a sizeable single.  In hindsight I should have not chosen the bold orange borders on the courthouse steps blocks... but hey... it's finished, and this border will hang off the end of the bed.

I did a mix of stippling the black and white prints... and quilting the coloured sections.


And used the magic binding technique using a scrappy peeper, with the Sketch as the binding portion.  Looks like a really complicated piping treatment, but I can only be thankful that the Sketch hides a multitude of sins.


From the back.


I placed my label so that it would get sewn into the binding... and just needed to handstitch the three sides after it was completed.  This ensures no little fingers could get caught in an unsewn loop.


Having quilting free areas means a bit of puffiness... sometimes this is good...


And sometimes not so good.


If I had more time I would have quilted more areas, and not had this problem.  I thought about adding some feathered sections to the pink parts of the star - most of these sections sat flat with a bit of encouragement - but just ran out of time.


Now that this project is crossed off the list, I got back to sewing my Sew House Seven "The Tea House Top and Dress".

You can see from the line drawings that this pattern has seams through the front that give it shaping, and that the pocket sides are caught in this seam, as well as the side seam.  There is a choice between side ties that are also sewn into this seam, or a back tunnel that captures a narrow tie, that can then be tied to the front.


I've got far enough through the process to be able to try it on... still need to finish some seams, and hem the bottom and the sleeves.

With this very drapy rayon the pockets just sort of hang in a somewhat depressed sort of way - interestingly each side hangs slightly differently.  Rayon is actually one of the fabrics recommended on the pattern packet - but I accept that some rayons are more drapey than others, and I think this rayon is just a bit too much.

Not only does the top of the pocket drape down, but the fullness of the pocket drapes down over the bottom stitching lines.

I never did quite get the back yoke to sit properly.  To be honest I kinda hate the back of this dress - it is very smock like, in a 90yr old granny sort of way.  My poor sewing skills have done it no favours.


I chose to alter the ties - I really dislike having wide ties that you do up at the back - I always find they sit right on a back bone and dig in.  But I am also not a fan of ties that come around to the front.  So, I narrowed the ties on the front...


And also added the ties to the back... so that I could tie it up at the sides.

Regardless of the shaping of the dress - it is actually the ties that give it any shape at all.  The built in shaping from the seams creates fullness in areas where I don't seem to be all that full. 

I think I bit off more than I could chew with this pattern - both with the design and the fabric choice.  I'm not sure whether I will wear it if/when it gets finished, but I'm planning a slight hi/low hem line - and am omitting the cuffed sleeves - they will just get a narrow hem and we'll call it done. 

Lesson's learnt - remember to look at the line drawing in detail before deciding to buy a pattern based on what the sample looks like.  Also, do the fabric wrinkle test in the shop - and remember that even expensive rayon is not worth the angst.

Sunday, November 26, 2017

Sewing Time

Once I had carved out a little bit of usable space in my sewing shed, I was back into creating again, cutting and stitching.  The fact that I still want to reorganise the rest of the sewing space is a secondary consideration and will happen probably in the middle of Xmas.  As I want to get my Orphan block medallion quilt finished before Xmas... I figured this was top priority.

Working with a square design, I knew that at some point it would need borders top and bottom to make it a rectangular single bed size.  Now was that time!  I just needed to decide what size the blocks were going to be, and single out a block I wanted to add that complemented the design.  Easy peasy!


After much adding and dividing, ahming and ahing, I decided on a 13" block for the bottom border, which meant five blocks across.  Then it was just the easy matter of working out a block that finished at 13".  Did I mention easy peasy?


Rescaling the flower block from my Craftsy Dash to the Finish quilt worked out well.  And alternating with a Courthouse Steps block meant that I didn't need to join the triangles together at the block intersections.  That's called cunning design skills! 

Just the top applique border to complete now, and I'll be onto quilting.

On the clothes sewing side of things, I have finally found some fabric that I want to make up into some of the patterns I have bought over the last few months.

I bought this Sew House Seven Tea House Dress pattern after seeing it made up in a floral fabric.  It was really pretty and summery... so the picture on the front, and in fact the line drawing were a little bit of a surprise on closer examination.


Spotlight had some great sales on, and after locating this rayon fabric, I decided to take the plunge and hope for the best.  

I don't mind the tiled pattern printing exercise... although it does seem overwhelming at times.


After ironing almost 5m of fabric... I was finally ready to lay it out.  Of course, I still seem to have a whole heap of fabric left.  This fabric measured at 135cm wide... so I went with the requirements for the 112cm layout just in case.  I need to straighten, pin and cut but that can wait for another day.


I also bought some Tencel fabric for these Burnside Bib overalls also from Sew House Seven.


This lovely Olive Tencel has a lovely drape, and I am a sucker for overalls.  Just have to hope that they look somewhat like the pattern.